Thursday, August 31, 2006
LAUREESA: NATURAL LIGHT PORTRAITS 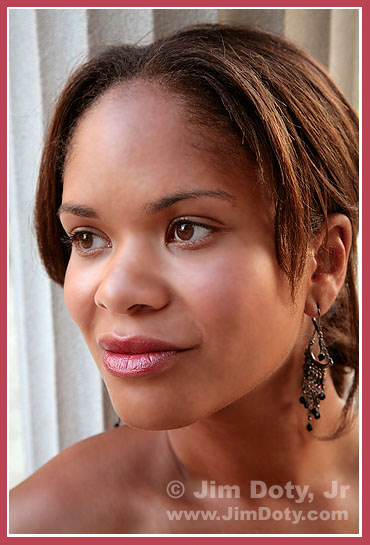
Laureesa. Photo © Jim Doty Jr
Although studio lights give you an amazing amount of control, you don't have to have studio lights to do nice portraits. The right kind of natural light can work very well. This photo was taken about 2 1/2 hours into a multi-location shoot. It was late in the afternoon and the sun was shining. We worked on the shady side of the columns to take advantage of the soft light of the eastern sky, creating a very subtle version of "short lighting" (see the next post). Light levels were low and cool so I raised the ISO on the camera and warmed up the color temperature. The sun was a little too high when we first arrived. As the sun got lower and dropped into the haze, it began to cast a soft warm light on Laureesa's hair and left cheek, adding just the right extra touch. I couldn't have asked for better light. It doesn't hurt at all that Laureesa has such nice facial features. Data: Canon 5D. Canon EF 24-105mm lens set at 67mm. Aperture: f/8. Shutter: 1/60 second. ISO: 800.
Tuesday, August 29, 2006
LAUREESA: STUDIO "SHORT LIGHTING" 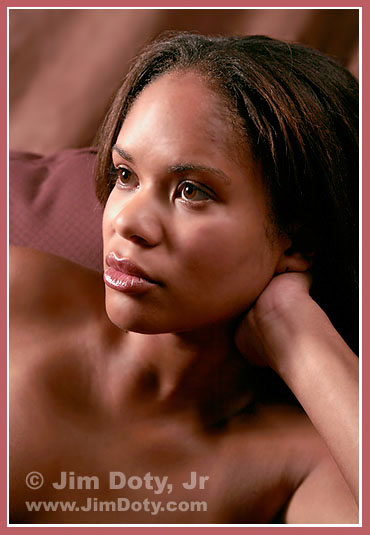
Laureesa. Photo © Jim Doty, Jr.
A recent stroll through two large malls with three different portait studios turned into an unplanned and brief study of "mall lighting". I wandered into all three studios and looked at the photos and watched them take some photos. In almost all of the photos the lighting was the same. Two light sources were placed in front of the subject. Each light was softened with an umbrella or "dish" to create a very soft, even light across the face with minimal or no shadows. It is attractive lighting and not difficult to do. It makes for quick shoots and fast turn around times. After going through the third studio, most of the photos began to have a certain "sameness" to them. Personally, I prefer more variety and at least a few photos with more drama and bold shadows. It takes longer to shoot this way, but it is how I like to work. I usually do sessions that last from 90 minutes to 2 hours (or more with some high energy people) with several different outfits and in several locations. The shoot goes by quickly and it is fun. When we are done, most people are surprised when they look at the clock. There are several basic forms of classical studio lighting with lots of variations. When the face is turned at an angle to the camera, the side most visible is called the "broad" side and the side turned away from the camera is the "short" side. Short side lighting, or "short lighting" is when the main (brighter) light is on the short side of the face, and the fill (dimmer) light is on the broad side of the face. Done correctly, it can be very attractive. Careful attention needs to be given to the location of the lights and where the shadows fall. When positioning the main light, the shadow from the nose usually should fall in the valley between the nose and the cheek bone. In the photo above, The main light is "camera left" and to the right of Laureesa's face. It is high enough to create a nice shadow underneath her left cheek and give some nice contours to her face, but not so high that there isn't a catch light in her eyes. The fill light is "camera right" and the light level is just high enough to fill in the shadows but dark enough to give the photo some drama. The fill light is to Laureesa's left and a little behind her left shoulder so it doesn't create a second catchlight in her eyes. Both the main and fill lights were bounced into umbrellas to soften the light. Data: Canon 5D. Canon EF 24-105mm lens set at 65mm. Aperture: f/8. Shutter: 1/100 second. ISO: 100. A pair of "ALIEN BEES" studio flash units (model B800) with umbrellas.
Saturday, August 26, 2006
GREAT NEWS! Canon EF 70-200 mm f/4L IS USM lens 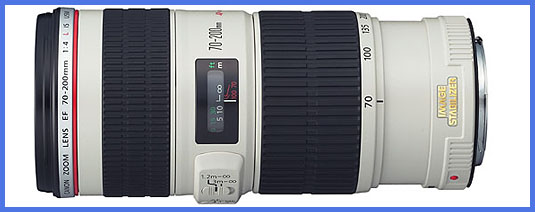
Recently announced Canon EF 70-200 mm f/4L IS lens
This week, Canon announced the new EF 70-200 mm f/4L IS USM lens. The expected release date is in November at a price somewhere around $1250 (USD). A lot of photographers, myself included, have been hoping and praying Canon would make this lens. The price should drop several months after its initial release and after the usual first rush of purchases. The non-IS version of this lens has been hugely (and deservedly) popular with photographers. It is one of the sharpest lenses in its class, reasonably sized, not too heavy, and great to work with. The non-IS f/4 lens is also much less expensive than the bigger and heavier (and really quite wonderful) 70-200 mm f/2.8L lenses (both IS and non-IS versions). The Canon EF 70-200 mm f/2.8L USM lens started it all. Superbly made, super sharp, and a joy to work with. It became the primary short telephoto zoom lens for a lot of photographers, myself included. Despite its fine attributes, a lot of photographers wanted a lighter and less costly version. Enter the f/4L version, smaller, lighter, much less expensive, but a virtual match in sharpness to the f/2.8 version. It quickly became popular with serious photographers who wanted a premium quality lens without a very expensive price. Canon came out with an IS (image stabilized) version of the f/2.8L lens and a lot of photographers upgraded. A lot more photographers longed for an f/4L lens with the IS feature. That day has come. If the new f/4L IS version proves to be as sharp as the rest of the Canon 70-200 L series lenses, lots of photographers will rejoice - and line up to buy it. This new lens sports the latest IS technology with a claimed 4 stop shake correction. That means you should be able to hand-hold this lens at four shutter speeds slower than a lens without image stabilization. I will keep you posted as test reports and purchase information become available. If you don't need the IS feature, the current version is still a great lens and you can buy it from Amazon.com for less than $600 and pay no shipping (link below). The Canon family of 70-200 L series lenses (along with current "street" prices) will soon look like this: Canon EF 70-200 mm f/4L USM (non-IS) - $591
Canon EF 70-200 mm f/4L IS USM - est. $1250 in November
Canon EF 70-200 mm f/2.8L USM (non-IS) - $1129
Canon EF 70-200 mm f/2.8L IS USM - $1699 It looks like the f/4L IS lens will be about the same price as the the f/2.8L non-IS lens. An interesting choice, one stop slower (in a smaller and lighter package) with IS or a one one stop faster lens without IS? More information from Canon is here and here. The current family of Canon EF 70-200 L series lenses:
Canon EOS Digital Rebel XTi/400D 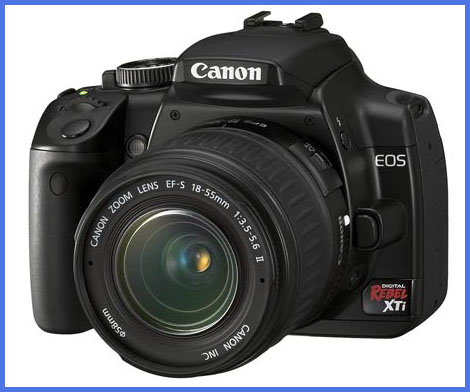
New Canon EOS Digital Rebel XTi/400D
This week Canon announced the new Digital Rebel XTi (400D in Europe). The XTi will have a 10.1 Megapixel CMOS sensor, a new EOS Integrated Cleaning System, and a larger and brighter 2.5” LCD and 9-point AF system. The maximum frame burst increases from 14 to 27 large JPEGs and from 5 to 10 RAW files. So how much better is this camera? This camera appears to be an incremental improvement rather than a big step forward. A bigger LCD is nice. A bigger burst rate may a help a tiny percentage of photographers. After all, who shoots 14 or 27 frames in a row anyway? Going from 8 to 10 megapixels shouldn't mean an increase in image quality at any but the largest print sizes. The new dust reduction system might be really nice. Dust in a D-SLR is a digital photographer's curse. If you are ready to buy your first Digital Rebel, and if testing shows that this camera is up to the quality of its predecessors (and it should be), then this camera would be a good choice. If you have a recent Digital Rebel, it may not be worth the price simply to upgrade for a few minor improvements. If you have one Digital Rebel and you need a second digital body, this would be a good choice. Is this camera better than similar models from competing brands? Maybe, but that really shouldn't matter. I've long maintained that a camera brand should be chosen for the quality and selection of the lenses rather than the current camera bodies. This is especially true if you have (or some day will have) specialized lens needs. Bodies get replaced, lenses are forever (or at least a long, long time). Look for a full review to appear at DP Review some time in the future. That will tell how significant the improvements really are. I will keep you posted. Canon has more information here.
Wednesday, August 16, 2006
DIGITAL TRIPLETS 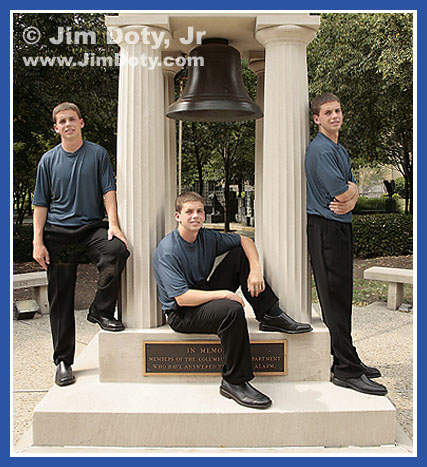
Three of Ryan. Photo © Jim Doty Jr.
If you do everything right during the shoot, it is pretty simple with digital photography to put one person in more than one location in the same photo, provided the light source remains constant. It didn't take much longer to composite the above photo in the computer than it did to set up and shoot in the first place. Working on the tiny details of the photo took a lot longer than compositing three photos together.
To keep things simple, the camera must be on a strudy tripod. Compose to allow a little more room in the final picture than you think you will need. Meter manually and focus manually. Don't change anything between exposures and don't bump the tripod or you will have to start over. Make sure while you are shooting that your subject isn't in overlapping locations unless you want a ghostly affect, or the very time consuming editing job of having your subject in one location that is behind another location. It looks nice, it just takes a lot more work, time, and skill to layer mask or erase the layers so it looks right when you are all done. I took serveral exposures of Ryan on the left with slightly different poses. Then several more with Ryan on the right and in the middle. We had to work quickly since thin clouds were moving across the sun and the light was changing a little. You can see more defined shadows on the left than the right due to the movement of the clouds between photos. If our light source had been more constant and given us more time, Ryan could have changed clothes so he would be wearing a different outfit in each location. When I got home, I picked one photo of Ryan in each location. These will each become a layer in my composite image with layer A on the bottom and layer C on top. I began with the photo of Ryan on the left (which will become layer A). Then I took the photo of Ryan on the right (which will become layer B), and SELECTED the whole photo in Photoshop, clicked the MOVE tool, and did a SHIFT-click-drag to pull layer B over layer A. Holding down the SHIFT key in Photoshop while doing the click-drag insures that the two photos are perfectly aligned after one is moved over the other. I created a layer mask with layer B and began erasing the left side of layer B to reveal Ryan underneath in layer A. The layer mask allows you to go back and un-erase and re-erase if you erase too much. If your software doesn't allow layer masks, use the ERASER tool, work carefully and save often so you don't have to start all over if you make a mistake. I made sure that I erased enough of layer B so that Ryan's shadow was also included. I didn't want to double erase (although that wouldn't be terribly difficult to do), so I took the photo with Ryan in the middle (which will become layer C) and I used the LASSO tool to draw a SELECTION around Ryan and his shadow. I made the selection a little bigger than I needed to so there was some room for error. Using the MOVE tool, I did a click-drag to bring my selection (layer C) on top of layers A and B. When layer C was close to being in place, I changed its opacity so I could see the layers underneath. Then I made sure that layer C was exactly aligned with the other layers by using the up-down and left-right arrows to move layer C one pixel at a time. When it was perfectly aligned, I changed the opacity of layer C back to 100%. I turned layer C into a layer mask and I erased the excess edges so that everything looked just right. Then I saved the whole thing with the layers intact before flattening the image and tweaking with LEVELS before preparing the image for the web. Preparing the fine details of the layered photo for a good print took a lot longer than compositing the three layers in the first place.
This is all fairly simple to do with a little practice and experience and some basic software that allows levels and has an eraser or layer masks. You can do this with film, but you will need to scan each image with exactly the same scanner settings, and it will take more time to align each layer.
Monday, August 07, 2006
SENIOR PIX?! 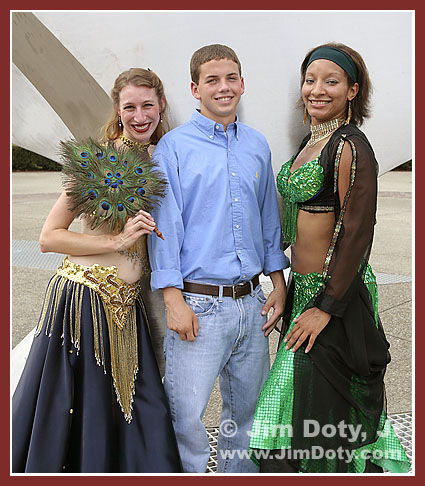
Ryan's Yearbook Photo? Photo © Jim Doty Jr.
Ryan's senior pictures will be even more unique than I had planned. We showed up at one of my pre-selected outdoor shooting locations, only to find these two dancers using the same location to shoot a video-tape for a national competition. (A good location is a good location.) They were doing the last few "takes" as we arrived. It would have been a shameful waste of good talent not to include them in some of Ryan's pictures. 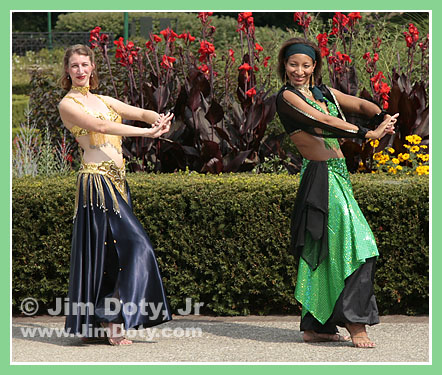
Belly Dancers. Photo © Jim Doty, Jr.
My thanks goes to both dancers for being nice enough to stay around at the end of a long, hot (no double meaning intended - it was 93 degrees outside) video session, and make Ryan's senior pictures more memorable. 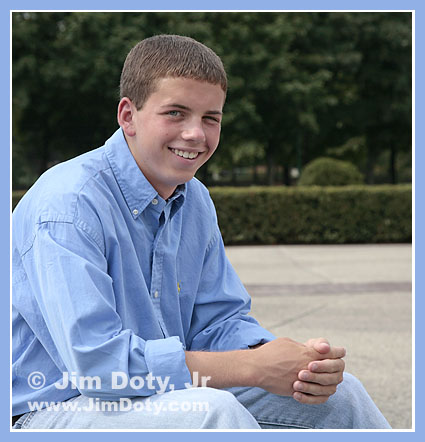
Ryan. Photo copyright Jim Doty Jr.
|