Thursday, December 28, 2006
PHOTO OF THE DAY: SUN DECKS 
Sun decks and pool of the Norwegian Dawn. Photo © Jim Doty Jr.
A balmy day in the Caribbean and people are soaking up the sun. to continue, use the page links to the right
In order to capture the full sweep of the deck area, I used a full frame fisheye lens. This accounts for the bowing of straight lines since fisheye lenses are non-rectilinear. The diagonal field of view is 180 degrees, giving this lens a very wide sweep. Canon 5D. Canon EF 15mm lens.
Thursday, December 14, 2006
Ahhh! CHRISTMAS! 
Santa and children. Photo © Jim Doty Jr.
Ahhh! Christmas! I was strolling through a local mall when I found - to my great surprise - Santa! (I could tell who he was by the name on his belt.) He was visiting with two adorable children. They chatted and I took pictures. (The mother gave me permission to use this photo on my web site.) I visited with Santa later in the day. He cut his beard down to 1/4 inch in length the day after last Christmas, and he has been letting it grow ever since. Hmmmm. I didn't know Santa cut his beard. The things they don't teach you in school. Live and learn. I hope you enjoy the Christams season as much as I do. Merry Christmas!
Friday, December 08, 2006
CHRISTMAS GIFT RECOMMENDATIONS It is the time of year that I get asked a lot of questions from people who are buying gifts for the photographers, or from photographers wanting to drop hints. (In this post, "photographer" means anyone who likes to take pictures.) "What is the best book for . . . ?" "What are the best point and shoot cameras?" "Is there any really good image editing software for less than $100?" Many of those questions are answered in the December posts here. Happy Gift Giving.
Sunday, December 03, 2006
Pentax K100D 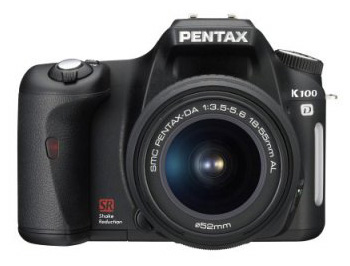
The Pentax K100D may be the camera you are looking for if you want to go digital with an entry level SLR and have Pentax KAF2, KAF, and KA mount lenses (K mount lenses work with limited funtionality). DP Review just published a full review of the K100D and gave it a HIGHLY RECOMMENDED rating, their highest. Image quality is significantly improved over the Pentax *st DS, is better than the Nikon D50 and very close to the Canon Rebel XT (350D). Read the full review for more details.
Saturday, December 02, 2006
A SATIRE ON PHOTO SHARING WEB SITES There are a lot of sites where photos are posted for critiques from other site members. Mike Johnston posted a deliciously satirical spoof of these sites at his blog, The Online Photographer. Enjoy!
Saturday, November 25, 2006
PHOTO OF THE DAY: ASH CAVE 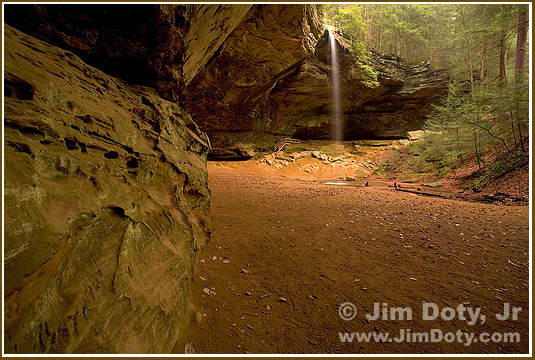
Ash Cave, Hocking Hills, Ohio. Photography © Jim Doty Jr.
Ash Cave is in Hocking Hills State Park in southeastern Ohio. The horseshoe shaped "recess" cave is 700 feet wide, 100 feet deep from the front edge to the rear wall, and 90 feet high from the floor to the rim. Due to its huge size it has been used for large meetings including church services where ministers would preach from "pulpit rock". Waterfall flow varies widely depending on the amount of recent rainfall and can occasionally by dry. The cave floor is 1/2 mile from the parking lot via the lower trail and it is wheel chair accessible. The upper trail climbs to the lip of the falls at the trail rim. The near cave wall is about one foot from the camera lens so the lens aperture was set to f/22 to allow for maximum depth of field. Data: Canon 5D with EF 17-40mm lens set at 17mm. Aperture: f/22, Shutter: 6 seconds, ISO: 100.
Thursday, November 16, 2006
PHOTO OF THE DAY: TAHQUAMENON FALLS 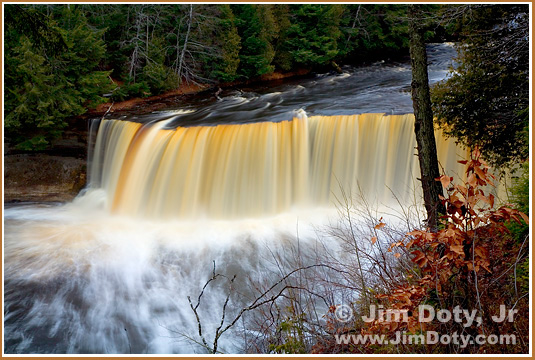
Upper Tahquamenon Falls. Photo © Jim Doty, Jr.
Upper Tahquamenon Falls is an impressive site any time of the year. to continue, use the page links to the right
Located between Paradise and Newberry in Michigan's Upper Peninsula (U.P.), it is well worth the trip. It is early winter and a small handful of people were out enjoying the falls. The tea color of the water is from tannic acid that leaches from the trees in the area. Some late winter photos with ice columns around the falls are here. 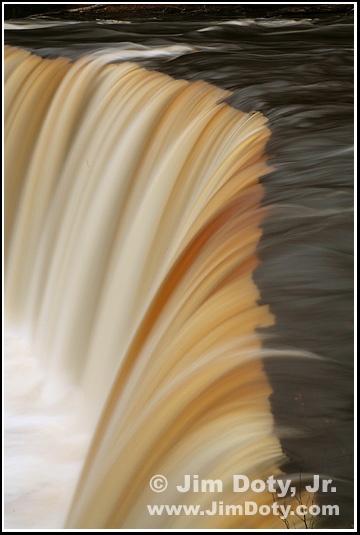
Overlooking the lip of Upper Tahquamenon Falls. Photo © Jim Doty, Jr.
Thursday, October 26, 2006
CANON DIGITAL REBEL XTi/400D 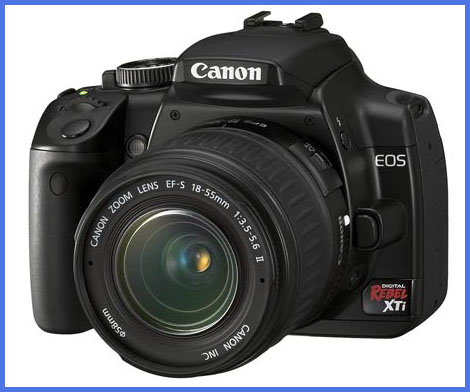
New Canon EOS Digital Rebel XTi/400D
I wrote about the new Digital Rebel XTi (400D in Europe) when it was first announced. It is now available for purchase. It received a HIGHLY RECOMMENDED rating (the highest possible rating) from DP Review (see the links below). The XTi will have a 10.1 Megapixel CMOS sensor, a new EOS Integrated Cleaning System, and a larger and brighter 2.5” LCD and 9-point AF system. The maximum frame burst increases from 14 to 27 large JPEGs and from 5 to 10 RAW files. So how much better is this camera? A bigger LCD is nice. A bigger burst rate may a help a tiny percentage of photographers. After all, who shoots 14 or 27 frames in a row anyway? Going from 8 to 10 megapixels shouldn't mean an increase in image quality at any but the largest print sizes. The new dust reduction system might be really nice. Dust in a D-SLR is a digital photographer's curse. If you are ready to buy your first Digital Rebel, then this camera would be a good choice. If you have a recent Digital Rebel, it may not be worth the price simply to upgrade for a few minor improvements. If you have one Digital Rebel and you need a second digital body, this would be a good choice. Is this camera better than similar models from competing brands? Maybe, but that really shouldn't matter. I've long maintained that a camera brand should be chosen for the quality and selection of the lenses rather than the current camera bodies. This is especially true if you have (or some day will have) specialized lens needs. Bodies get replaced, lenses are forever (or at least a long, long time). A full review is now available at DP Review.
Order this camera with the 18-55mm kit lens: or get the body only:
Friday, October 20, 2006
SAVE INK, DON'T CHANGE THAT CARTRIDGE 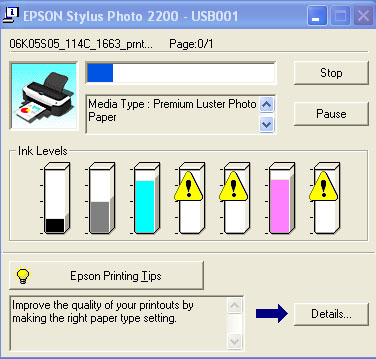
Epson's Low Ink Warning
Don't change the ink cartridge when you get the low ink warning (above) from your Epson printer. There is more ink left in the cartridge than you might think. I've printed five or six 8x10 inch prints after getting the yellow diamond warning before the ink cartridge was completely empty. On the day I made these illustrations, I printed two 11x16 inch prints and one 8x10 inch print between the time I got the first warning and when the ink cartridge needed to be replaced. What happens if a cartridge runs out of ink in the middle of making a print? With my Epson 2200 printer, the printer stops mid-print and tells me to replace the ink cartridge. Once the cartridge is replaced, the printer charges the ink cartridges and resumes printing. The print shows no evidence that a cartridge was replaced in the middle of the printing process. So save yourself some money and wait to replace the cartridge until you get the out of ink warning (below). Once the white cross in a red circle appears, the printer will not continue printing until you replace the empty cartridge. 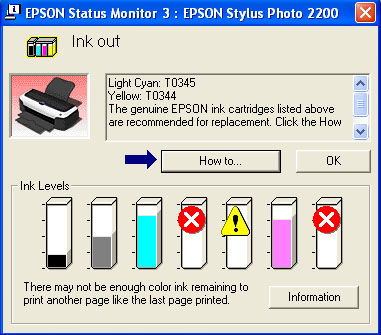
Epson's Out Of Ink Warning
Thursday, October 12, 2006
PHOTO OF THE DAY: ROAD TO NOWHERE 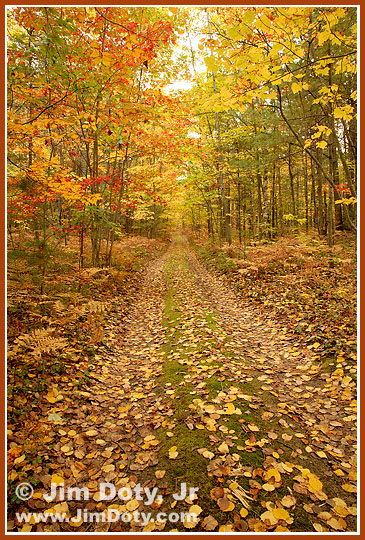
"Seasonal Road", Hiawatha National Forest. Photo © Jim Doty, Jr.
When you see "Seasonal Road" on a sign in Michigan's Upper Peninsula, what it really means is "You are on your own." Seasonal roads are not maintained. They are usually passable in a 2-wheel drive vehicle from late spring through late fall if they aren't too wet and you are careful not to get high centered. In a typical Michigan winter with several feet of snow on the ground, they are snow mobile only. These roads are usually used by hikers, hunters, snow mobilers and the occasional photographer.
Monday, October 09, 2006
PHOTO OF THE DAY: DAWN AT THE MACKINAC BRIDGE 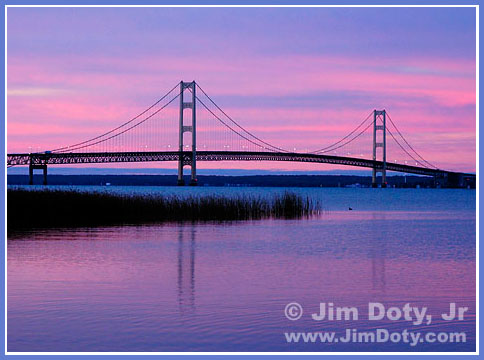
The Mackinac Bridge at Dawn. Photo © Jim Doty, Jr.
Early morning light from the north side of the bridge looking southeast. From the north side of the bridge, exit I-75 at US 2 and go west. Turn south on the road to the Father Marquette Memorial and go past the memorial to the bridge viewing area.
Sunday, October 08, 2006
PHOTO OF THE DAY: TURNING LEAVES 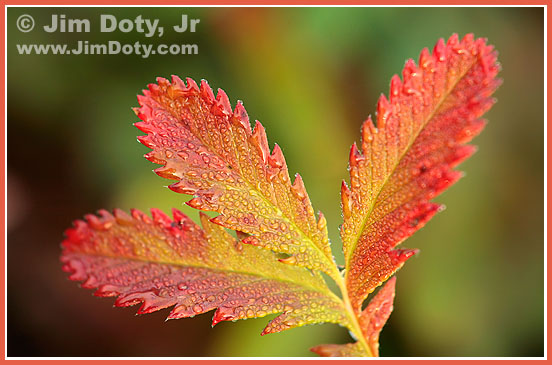
Turning Leaves. Photo © Jim Doty Jr.
After shooting a somewhat lackluster sunrise from the north shore of Lake Michigan, I looked down at my feet. The dew covered leaves were varying shades of green, orange and red. I picked out a nice cluster with a pleasing background and dropped my tripod legs to get my camera about a foot off the ground. I put a Canon 500D double element closeup lens on my 70-200mm zoom lens so it could focus closeup enough to provide enough magnification of the small leaves. The 500D is actually a screw in closeup filter with two pieces of glass for better image quality. It is an excellent and relatively inexpensive way to do quality closeup work if you have a lens in the 200mm range. The shutter speed was slow, a recipe for unsharp images with longer lenses, so I turned on the mirror lockup feature on the camera body. The mirror locks up prior to the shutter release so there is no vibration from the mirror slap. I use mirror lockup with long lenses (200mm and longer) any time the shutter speed is between 1/30 and 1/4 second. I would not buy a camera body for critical work that didn't have mirror lockup. In order to keep the background out of focus, I used a wide aperture so depth of field was minimal. Only part of the center leaf is in sharp focus. With a much smaller aperture, all of the leaves would look sharp due to increased depth of field, but the background would no longer be soft for the same reason. I could preview the results with the camera's depth of field preview button, another valuable feature. Data: Canon 5D. Canon EF 70-200mm lens at 180mm with a 500D closeup lens. Aperture: f/4. Shutter: 1/30 second. ISO: 100.
Saturday, October 07, 2006
PHOTO OF THE DAY: CUT RIVER GORGE 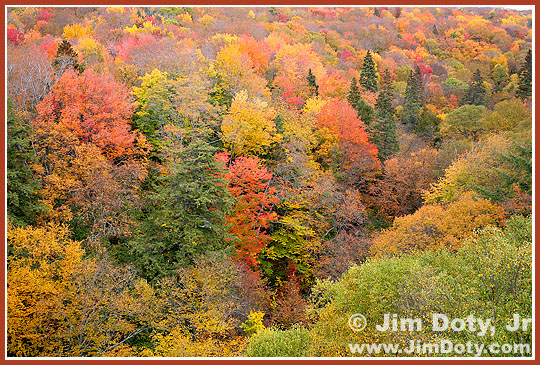
Cut River Gorge from the Cut River Bridge. Photo © Jim Doty, Jr.
The Cut River Bridge in Michigan's Upper Peninsula is a popular spot. On the day I was there, lots of tourists were lined up on the bridge to take photos. The view is beautiful in any season and especially in the fall. The only secret to getting a good photo is to wait until cars and trucks pass by before clicking the shutter since the bridge sways with the traffic. If it is a cloudy day, leave out all or most of the gray sky. Contrary to popular belief, fall colors can be rich and saturated when it is cloudy as it was on the morning I took this photo. I've seen several published versions of the same scene from a variety of professional photographers. This is a popular place. From just north of the the Mackinac Bridge between the Upper and Lower Peninsulas, leave I-75 and take U.S. 2 west. It is less than a 30 minute drive from the Mackinac Bridge to the Cut River Bridge. There are parking lots and picnic tables on each side of the bridge. Data: Canon 5D. Canon EF 24-105 lens at 37mm. Aperture: f/8. Shutter: 1/30. ISO: 100.
Friday, October 06, 2006
PHOTO OF THE DAY: SUNSET, LAKE MICHIGAN 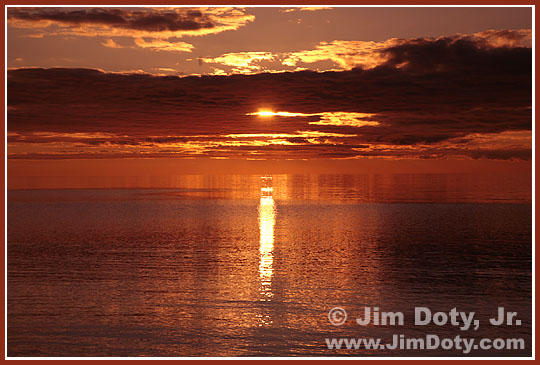
Thursday, October 05, 2006
PHOTO OF THE DAY: THE MACKINAC BRIDGE AT NIGHT 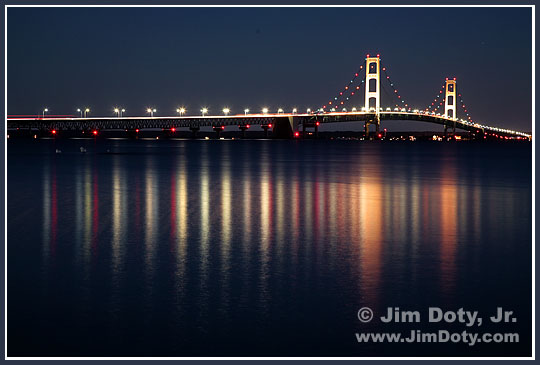
The Mackinac Bridge. Photo © Jim Doty, Jr.
The Mackinac Bridge (pronounced mack-i-naw) between Michigan's upper and lower peninsulas is a magnicificent sight. At five miles in length, it is one of the longest suspension bridges in North America. This photo was taken at deep dusk from the north side of the bridge. Data: Canon 5D, Canon EF 24-105mm lens at 96mm. Shutter: 30 seconds. Aperture: f/8. ISO: 400.
Monday, October 02, 2006
PHOTO OF THE DAY: TAHQUAMENON FALLS 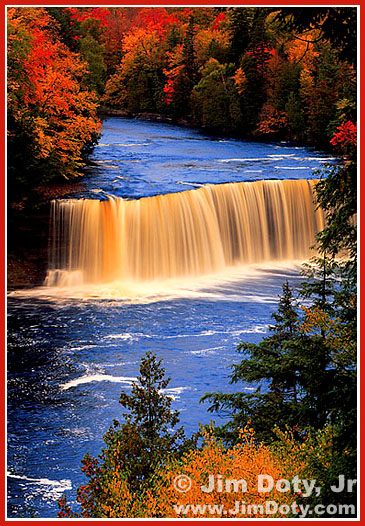
Upper Tahquamenon Falls, Michigan. Photo © Jim Doty, Jr.
My two favorite places to film fall color are Colorado and Michigan. Colorado aspens turn gold and Michigan maples turn red. The color show in Colorado is beginning to wind down. Due to an unfortnate mix of weather conditions, the color show in Colorado was not as stunning as it usually is, but reports indicate there were some pockets of fine color (check out Todd Caudle's photos on this thread). Unfortunately, I didn't get to check this out for myself. On the other hand, reports from Michigan indicate that the UP (upper peninsula) looks great this year and the color is working it's way south. If you are headed for the UP, go now. I updated my fall color report page with some new Michigan links for the benefit of everyone who will be filming the gorgeous colors in the Great Lakes State. The photo above of Upper Tahquamenon Falls is one of my favorites and it is currently linked to by a number of websites. The water really is "tea" colored due to leeching from trees in the area. Other places in the country should also have some great color. Go out and have some fun!
Thursday, September 28, 2006
NIKON D80 REVIEW 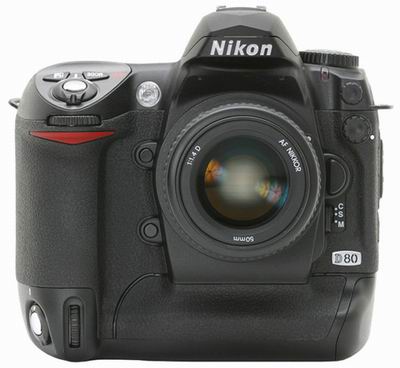
A full review of the Nikon D80 has just been posted at DP Review. This is a great camera and Phil Askey gives it a much deserved HIGHLY RECOMMENDED rating (his highest). If you have Nikon lenses and have been thinking about jumping into digital, this is a great way to do it. If you hve an older Nikon didital SLR, is is worth upgrading? That depends on which D-SLR you have and whether or not you consider the features and improved image quality worth the price. Read the review and weigh your options. There is also a hands on look in the August issue of Popular Photography which is also posted online. They call it a "D200 at nearly half the price". I don't shoot Nikon, but I'm glad to see good competition. It keeps all of the manufacturers on their toes.
Wednesday, September 27, 2006
ADOBE PHOTOSHOP LIGHTROOM (beta 4) The latest version of Adobe Photoshop Lightroom (beta 4) is now available as a
free download for MAC or Windows. This is fully functional (so far as a beta release goes) software that you can try out. Early reviews of the MAC versions have been good. Wuindows reviews have been more iffy since the Windoews versions have lagged the MAC versions. Adobe has not brought the Windows version up to speed. Try it out!
Monday, September 18, 2006
FALL COLOR REPORTS 
Aspen, Marshall Pass, Colorado. Photo © Jim Doty, Jr.
The hearts of landscape photographers are beating faster. Shutter fingers are getting itchy. Visions of gold and orange and red and crimson dance in their heads. Fall color is already arriving in various parts of the country, especially up north and at higher elevations in the Rocky Mountains. Reports this week indicate that some places in Colorado are already nearing peak color. You can keep up with the changing colors. I just updated my page of links to fall color reports and locations. Head out with your camera and have some fun!
Monday, September 11, 2006
REMEMBERING 9-11 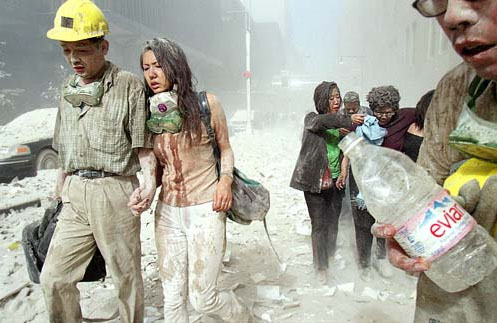
Photo by James Nachtwey for TIME magazine.
On this date, five years ago, we experienced a great national tragedy in the United States. Not only in the lives that were lost in the terrorist attacks, the families torn asunder, and the emergency responders who are suffering terrible health problems as a result of working at the scene - but also in the way we view ourselves and our world. The photo essays linked below (in the September 9 post) are a reminder of what we all went through on that fateful day.
Sunday, September 10, 2006
BILL BIGGART: REMEMBERING 9-11 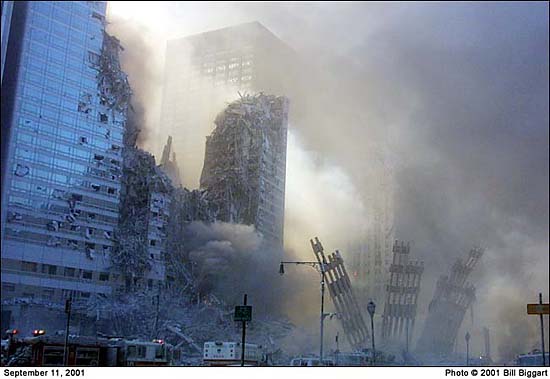
Bill Biggart's final photograph. He was killed when the second World Trade tower collapsed on top of him. He was 53 years old.
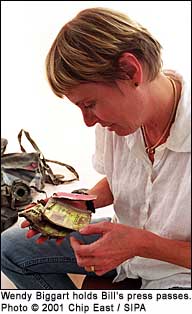
You can read the story about Bill Biggart's last images and see an album of his last photos at The Digital Journalist. You can see other 9-11 photo albums by Chip East, Peter Turnley, David Turnley, and Aris Economopoulos. 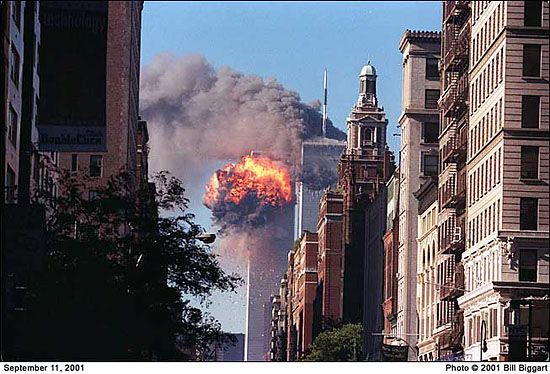
Monday, September 04, 2006
"CROCODILE HUNTER" STEVE IRWIN 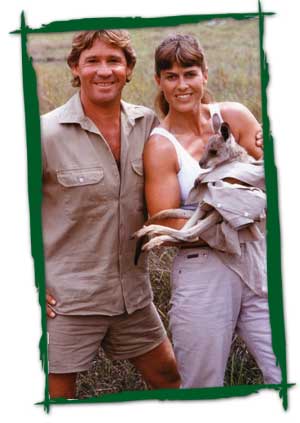
Steve Irwin, his wife Terri, and a Joey
I was saddened to hear about the death of Steve Irwin who was stabbed in the heart by a sting-ray barb while filming off Australia's coast. I liked his high energy, somewhat over the top style as he shared his love for crocodiles in particular and the wonders of the natural world in general. He will be missed. My thoughts and prayers are with his wife Terri, their children, and the rest of the family.
Friday, September 01, 2006
PHOTO OF THE DAY: LARK 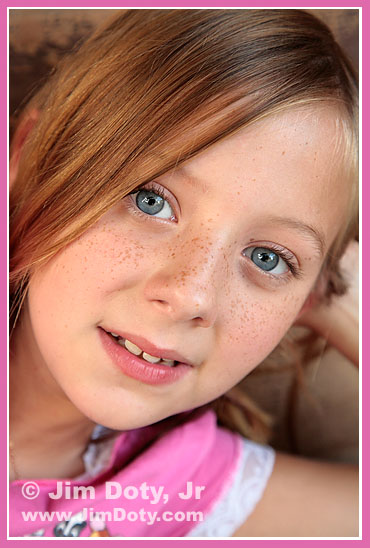
Lark. Photo © Jim Doty, Jr.
One of my favorite photos from a recent portrait session. It was sunny outside so we used the nice soft light provided by the overhang on my front porch. Children are wonderful! Data: Canon 5D. Canon EF 24-105mm lens at 84mm. Aperture: f/5.6. Shutter: 1/40 second. ISO 400.
Thursday, August 31, 2006
LAUREESA: NATURAL LIGHT PORTRAITS 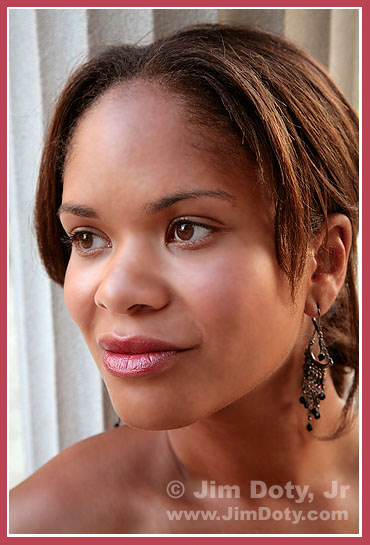
Laureesa. Photo © Jim Doty Jr
Although studio lights give you an amazing amount of control, you don't have to have studio lights to do nice portraits. The right kind of natural light can work very well. This photo was taken about 2 1/2 hours into a multi-location shoot. It was late in the afternoon and the sun was shining. We worked on the shady side of the columns to take advantage of the soft light of the eastern sky, creating a very subtle version of "short lighting" (see the next post). Light levels were low and cool so I raised the ISO on the camera and warmed up the color temperature. The sun was a little too high when we first arrived. As the sun got lower and dropped into the haze, it began to cast a soft warm light on Laureesa's hair and left cheek, adding just the right extra touch. I couldn't have asked for better light. It doesn't hurt at all that Laureesa has such nice facial features. Data: Canon 5D. Canon EF 24-105mm lens set at 67mm. Aperture: f/8. Shutter: 1/60 second. ISO: 800.
Tuesday, August 29, 2006
LAUREESA: STUDIO "SHORT LIGHTING" 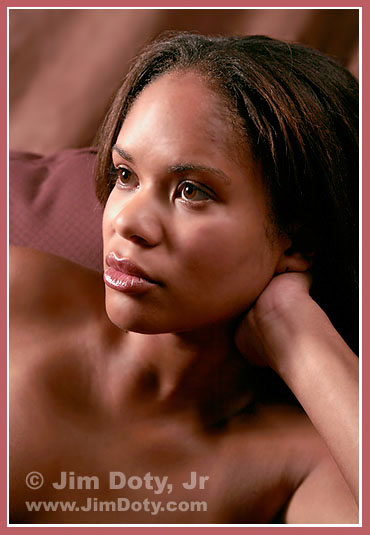
Laureesa. Photo © Jim Doty, Jr.
A recent stroll through two large malls with three different portait studios turned into an unplanned and brief study of "mall lighting". I wandered into all three studios and looked at the photos and watched them take some photos. In almost all of the photos the lighting was the same. Two light sources were placed in front of the subject. Each light was softened with an umbrella or "dish" to create a very soft, even light across the face with minimal or no shadows. It is attractive lighting and not difficult to do. It makes for quick shoots and fast turn around times. After going through the third studio, most of the photos began to have a certain "sameness" to them. Personally, I prefer more variety and at least a few photos with more drama and bold shadows. It takes longer to shoot this way, but it is how I like to work. I usually do sessions that last from 90 minutes to 2 hours (or more with some high energy people) with several different outfits and in several locations. The shoot goes by quickly and it is fun. When we are done, most people are surprised when they look at the clock. There are several basic forms of classical studio lighting with lots of variations. When the face is turned at an angle to the camera, the side most visible is called the "broad" side and the side turned away from the camera is the "short" side. Short side lighting, or "short lighting" is when the main (brighter) light is on the short side of the face, and the fill (dimmer) light is on the broad side of the face. Done correctly, it can be very attractive. Careful attention needs to be given to the location of the lights and where the shadows fall. When positioning the main light, the shadow from the nose usually should fall in the valley between the nose and the cheek bone. In the photo above, The main light is "camera left" and to the right of Laureesa's face. It is high enough to create a nice shadow underneath her left cheek and give some nice contours to her face, but not so high that there isn't a catch light in her eyes. The fill light is "camera right" and the light level is just high enough to fill in the shadows but dark enough to give the photo some drama. The fill light is to Laureesa's left and a little behind her left shoulder so it doesn't create a second catchlight in her eyes. Both the main and fill lights were bounced into umbrellas to soften the light. Data: Canon 5D. Canon EF 24-105mm lens set at 65mm. Aperture: f/8. Shutter: 1/100 second. ISO: 100. A pair of "ALIEN BEES" studio flash units (model B800) with umbrellas.
Saturday, August 26, 2006
GREAT NEWS! Canon EF 70-200 mm f/4L IS USM lens 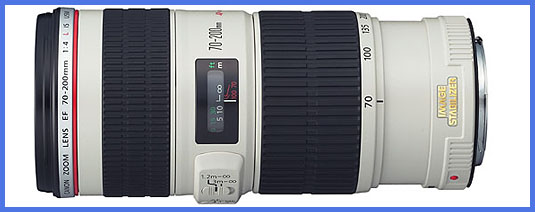
Recently announced Canon EF 70-200 mm f/4L IS lens
This week, Canon announced the new EF 70-200 mm f/4L IS USM lens. The expected release date is in November at a price somewhere around $1250 (USD). A lot of photographers, myself included, have been hoping and praying Canon would make this lens. The price should drop several months after its initial release and after the usual first rush of purchases. The non-IS version of this lens has been hugely (and deservedly) popular with photographers. It is one of the sharpest lenses in its class, reasonably sized, not too heavy, and great to work with. The non-IS f/4 lens is also much less expensive than the bigger and heavier (and really quite wonderful) 70-200 mm f/2.8L lenses (both IS and non-IS versions). The Canon EF 70-200 mm f/2.8L USM lens started it all. Superbly made, super sharp, and a joy to work with. It became the primary short telephoto zoom lens for a lot of photographers, myself included. Despite its fine attributes, a lot of photographers wanted a lighter and less costly version. Enter the f/4L version, smaller, lighter, much less expensive, but a virtual match in sharpness to the f/2.8 version. It quickly became popular with serious photographers who wanted a premium quality lens without a very expensive price. Canon came out with an IS (image stabilized) version of the f/2.8L lens and a lot of photographers upgraded. A lot more photographers longed for an f/4L lens with the IS feature. That day has come. If the new f/4L IS version proves to be as sharp as the rest of the Canon 70-200 L series lenses, lots of photographers will rejoice - and line up to buy it. This new lens sports the latest IS technology with a claimed 4 stop shake correction. That means you should be able to hand-hold this lens at four shutter speeds slower than a lens without image stabilization. I will keep you posted as test reports and purchase information become available. If you don't need the IS feature, the current version is still a great lens and you can buy it from Amazon.com for less than $600 and pay no shipping (link below). The Canon family of 70-200 L series lenses (along with current "street" prices) will soon look like this: Canon EF 70-200 mm f/4L USM (non-IS) - $591
Canon EF 70-200 mm f/4L IS USM - est. $1250 in November
Canon EF 70-200 mm f/2.8L USM (non-IS) - $1129
Canon EF 70-200 mm f/2.8L IS USM - $1699 It looks like the f/4L IS lens will be about the same price as the the f/2.8L non-IS lens. An interesting choice, one stop slower (in a smaller and lighter package) with IS or a one one stop faster lens without IS? More information from Canon is here and here. The current family of Canon EF 70-200 L series lenses:
Canon EOS Digital Rebel XTi/400D 
New Canon EOS Digital Rebel XTi/400D
This week Canon announced the new Digital Rebel XTi (400D in Europe). The XTi will have a 10.1 Megapixel CMOS sensor, a new EOS Integrated Cleaning System, and a larger and brighter 2.5” LCD and 9-point AF system. The maximum frame burst increases from 14 to 27 large JPEGs and from 5 to 10 RAW files. So how much better is this camera? This camera appears to be an incremental improvement rather than a big step forward. A bigger LCD is nice. A bigger burst rate may a help a tiny percentage of photographers. After all, who shoots 14 or 27 frames in a row anyway? Going from 8 to 10 megapixels shouldn't mean an increase in image quality at any but the largest print sizes. The new dust reduction system might be really nice. Dust in a D-SLR is a digital photographer's curse. If you are ready to buy your first Digital Rebel, and if testing shows that this camera is up to the quality of its predecessors (and it should be), then this camera would be a good choice. If you have a recent Digital Rebel, it may not be worth the price simply to upgrade for a few minor improvements. If you have one Digital Rebel and you need a second digital body, this would be a good choice. Is this camera better than similar models from competing brands? Maybe, but that really shouldn't matter. I've long maintained that a camera brand should be chosen for the quality and selection of the lenses rather than the current camera bodies. This is especially true if you have (or some day will have) specialized lens needs. Bodies get replaced, lenses are forever (or at least a long, long time). Look for a full review to appear at DP Review some time in the future. That will tell how significant the improvements really are. I will keep you posted. Canon has more information here.
Wednesday, August 16, 2006
DIGITAL TRIPLETS 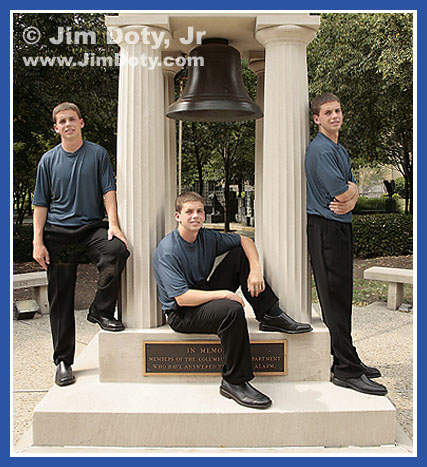
Three of Ryan. Photo © Jim Doty Jr.
If you do everything right during the shoot, it is pretty simple with digital photography to put one person in more than one location in the same photo, provided the light source remains constant. It didn't take much longer to composite the above photo in the computer than it did to set up and shoot in the first place. Working on the tiny details of the photo took a lot longer than compositing three photos together.
To keep things simple, the camera must be on a strudy tripod. Compose to allow a little more room in the final picture than you think you will need. Meter manually and focus manually. Don't change anything between exposures and don't bump the tripod or you will have to start over. Make sure while you are shooting that your subject isn't in overlapping locations unless you want a ghostly affect, or the very time consuming editing job of having your subject in one location that is behind another location. It looks nice, it just takes a lot more work, time, and skill to layer mask or erase the layers so it looks right when you are all done. I took serveral exposures of Ryan on the left with slightly different poses. Then several more with Ryan on the right and in the middle. We had to work quickly since thin clouds were moving across the sun and the light was changing a little. You can see more defined shadows on the left than the right due to the movement of the clouds between photos. If our light source had been more constant and given us more time, Ryan could have changed clothes so he would be wearing a different outfit in each location. When I got home, I picked one photo of Ryan in each location. These will each become a layer in my composite image with layer A on the bottom and layer C on top. I began with the photo of Ryan on the left (which will become layer A). Then I took the photo of Ryan on the right (which will become layer B), and SELECTED the whole photo in Photoshop, clicked the MOVE tool, and did a SHIFT-click-drag to pull layer B over layer A. Holding down the SHIFT key in Photoshop while doing the click-drag insures that the two photos are perfectly aligned after one is moved over the other. I created a layer mask with layer B and began erasing the left side of layer B to reveal Ryan underneath in layer A. The layer mask allows you to go back and un-erase and re-erase if you erase too much. If your software doesn't allow layer masks, use the ERASER tool, work carefully and save often so you don't have to start all over if you make a mistake. I made sure that I erased enough of layer B so that Ryan's shadow was also included. I didn't want to double erase (although that wouldn't be terribly difficult to do), so I took the photo with Ryan in the middle (which will become layer C) and I used the LASSO tool to draw a SELECTION around Ryan and his shadow. I made the selection a little bigger than I needed to so there was some room for error. Using the MOVE tool, I did a click-drag to bring my selection (layer C) on top of layers A and B. When layer C was close to being in place, I changed its opacity so I could see the layers underneath. Then I made sure that layer C was exactly aligned with the other layers by using the up-down and left-right arrows to move layer C one pixel at a time. When it was perfectly aligned, I changed the opacity of layer C back to 100%. I turned layer C into a layer mask and I erased the excess edges so that everything looked just right. Then I saved the whole thing with the layers intact before flattening the image and tweaking with LEVELS before preparing the image for the web. Preparing the fine details of the layered photo for a good print took a lot longer than compositing the three layers in the first place.
This is all fairly simple to do with a little practice and experience and some basic software that allows levels and has an eraser or layer masks. You can do this with film, but you will need to scan each image with exactly the same scanner settings, and it will take more time to align each layer.
Monday, August 07, 2006
SENIOR PIX?! 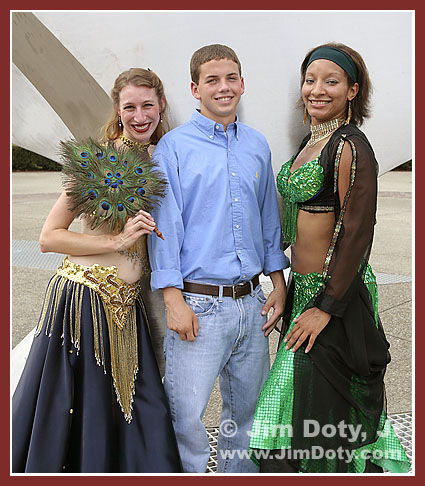
Ryan's Yearbook Photo? Photo © Jim Doty Jr.
Ryan's senior pictures will be even more unique than I had planned. We showed up at one of my pre-selected outdoor shooting locations, only to find these two dancers using the same location to shoot a video-tape for a national competition. (A good location is a good location.) They were doing the last few "takes" as we arrived. It would have been a shameful waste of good talent not to include them in some of Ryan's pictures. 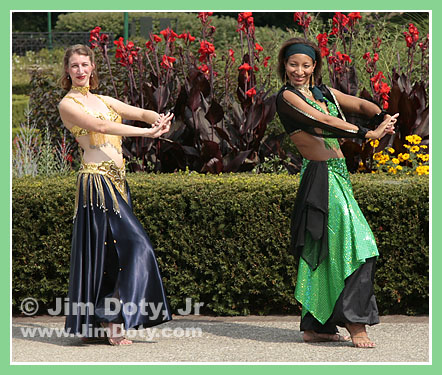
Belly Dancers. Photo © Jim Doty, Jr.
My thanks goes to both dancers for being nice enough to stay around at the end of a long, hot (no double meaning intended - it was 93 degrees outside) video session, and make Ryan's senior pictures more memorable. 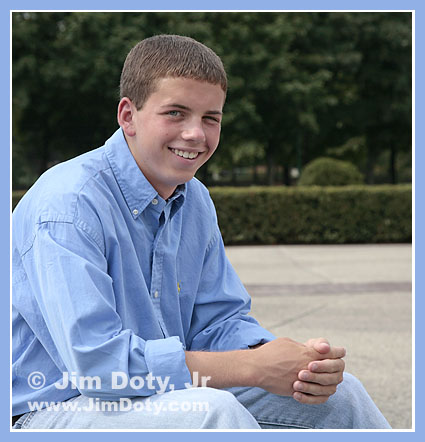
Ryan. Photo copyright Jim Doty Jr.
Tuesday, July 25, 2006
SPEC 2006 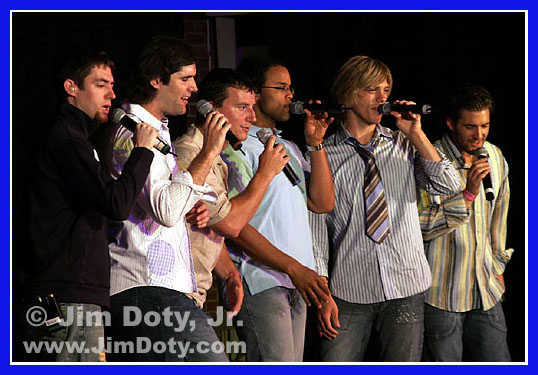
"Chapter 6" at SPEC 2006. Photo © Jim Doty Jr.
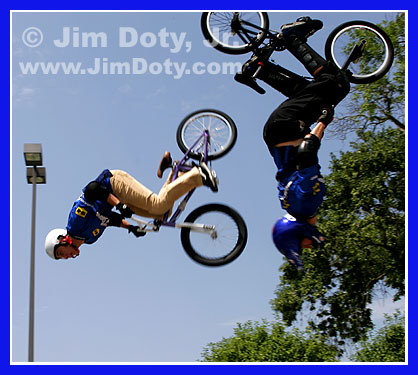
BMX at SPEC. Side by side back flips. Photo © Jim Doty Jr.
Sunday, July 23, 2006
PHOTO OF THE DAY: STANFORD MEMORIAL CHURCH 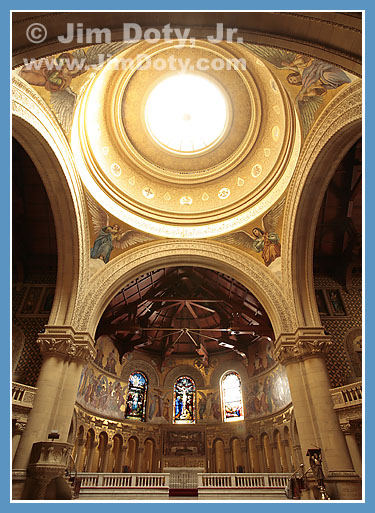
Memorial Church, Stanford University. Photo © Jim Doty, Jr.
Stanford University in Palo Alto California has a beautiful campus. One of the photographic opportunities is the Memorial Church which is open for visitors until 5 pm (except on Sunday when it is open only for services). Visitors wander around to take it all in and take pictures. I had to wait for a while until no one was in my photo. A tiny flash on a point-and-shoot camera won't help much in the large sanctuary. Use a high ISO (film or digital) and a wide aperture if you take hand held photos. Better yet, bring a tripod. I used a tripod mounted camera with a wide angle lens. Data: Canon 5D, EF 17-40mm lens set at 20mm. Aperture: f/16, Shutter: 2 seconds, ISO 100.
Friday, July 21, 2006
THE MERCED RIVER BELOW HALF DOME 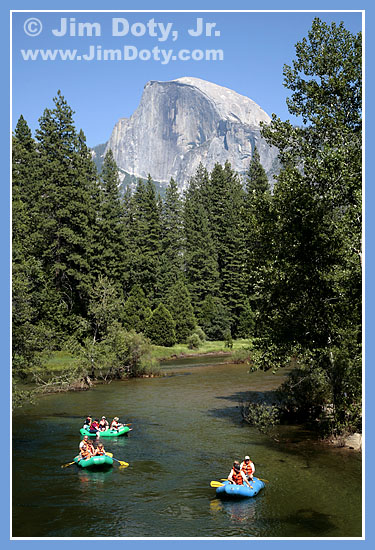
The Merced River Below Half Dome, Yosemite National Park. Photo © Jim Doty, Jr.
Half Dome and the Merced river from Sentinel Bridge is one of the classic photo locations in Yosemite Valley. On pleasant summer days people are rafting down the river. In the fall and winter the river is more placid and you can get reflections of Half Dome. Countless photographers, both famous and lesser know, have used this vantage point. While you are scouting about for your own unique view of Half Dome, you might as well stop and take at least one photo from this classic view point.
Thursday, July 20, 2006
PANORAMA: GATES OF THE VALLEY 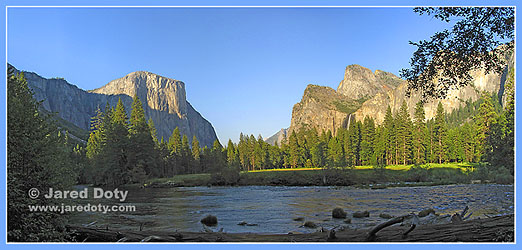
"Gates of the Valley", Yosemite National Park. Photo © Jared Doty.
A bigger version of this photo is currently located here.
Can a hand-held, 6 megapixel point-and-shoot digital camera take a better photo than an expensive 12.8 megapixel D-SLR and a high quality lens? As soon as we arrived at "Gates of the Valley" (also called "Valley View"), my son Jared took a series of seven, hand-held, vertical photos with a Canon Powershot S3 IS camera. I was busy setting up my tripod. He overlapped each photo with the prior photo to allow for stitching together later in the computer. The camera was set in an autoexposure mode so the exposures varied from 1/160 at f/5.6 to 1/250 at f/5.6. The software compensated for the exposure variations. The first photo was taken at 7:03:08 pm PDT and the last at 7:03:52, a total elapsed time of 44 seconds. By the time my tripod was set up and my camera mounted, he was done with his first series. He did take more photos over the next 45 minutes, but this set was definitely a prize winner. When we got home, I loaded the seven individual photos into Autostitch, set the scale to 100% (full size pano) and left while the software did its thing (it takes a while to do full size panos in Autostitch). I came back a half hour later and the software was done (I don't know how long it took to stitch the images and the time would vary with the horsepower of the computer.) The end result was a 45.5 MB tiff file (156 MB in layers as a PSD file) that would print out at 9 x 19.5 inches at 300 ppi without any interpolation. I downsized the image to 8.5 x 18.5 inches so we could make a print that would fit on 13 x 19 inch paper. The photo looks great and my son was really pleased with the results. The file should interpolate up in size to allow for a nice 14 x 30 inch panoramic print (our next project). I compared the resolution of the panoramic file from the S3 to a similar single photo of the same scene from my Canon 5D and EF 24-105mm L series lens. The rocks on El Capitan looked much sharper in my son's pano than in my single photo, as would be expected. A series of photos stitched together, even from a camera with less native resolution (less pixels or photosites on the sensor), can have more total information than a single photo from a camera with a higher resolution sensor. In this particular instance, Jared created a higher resolution photo with a $430 camera than I did with equipment costing several times as much. Had I done a similar set of vertical photos with my equipment at the equivalent angle of view, and stitched it together later, my photo would look just as good or better in a very large print, but I didn't do that. I did note some color fringing in high contrast areas with the Canon S3 lens that I did not have with the 24-105mm lens. The 24-105 lens is a better lens. The good news is that the color fringing does not show in the 8.5 x 18.5 inch print. The really good news is that a camera with less resolution and a somewhat inferior lens can produce better photos than a single high resolution photo from a more expensive camera and lens if the photo is divided up into separate shots and stitched together later. Something to think about if you are using a point-and-shoot camera and you are doing a big scenic photo and want a big enlargement. Of course, it should be a good quality camera to begin with. On the other hand, even with a higher resolution camera, if you want a really big print, take a set of photos and stitch them together later, rather than doing it all at once in one shot with a wider angle lens. To find the Gates of the Valley location, read the next post. The Canon Powershot S3 IS camera is a fine camera for still shots. It has a class leading movie mode, the reason I bought the camera in the first place. Why look at dinky little movie clips of my grandchildren when I can have screen filling clips at the touch of a button. The camera has received top marks from DP Review and Popular Photography magazine (June 2006 issue). It is the camera I carry if I don't have a D-SLR with me. If you want to buy one, you can get a great price, pay no shipping, and help suport this site by buying your camera at the Amazon link below. Autostitch is great software for stitching photos together in a Windows XP computer, and the demo version is free. Read more in the Autostitch article at my photo web site.
Tuesday, July 18, 2006
PHOTO OF THE DAY: GATES OF THE VALLEY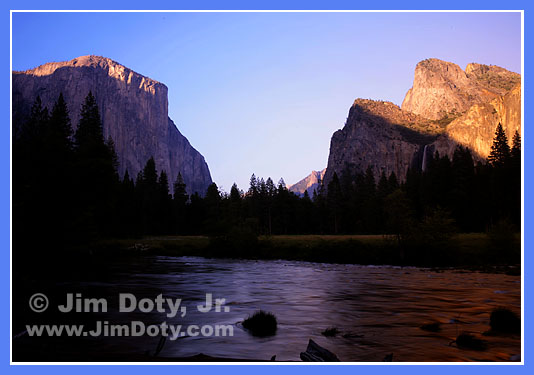
Gates of the Valley, Yosemite National Park. Photo © Jim Doty Jr.
"Gates of the Valley", also know as "Valley View", is one of the best views of Yosemite Valley and is a favorite spot for photographes at the end of the day. This location is on the Northside Road toward the western end of the valley about 4.3 miles west of Yosemite Lodge. It is marked on almost all park maps and photographic guide books. It is worth scouting out ahead of time so you can find it quickly at the end of the day. El Capitan is on the left, Cathedral Rocks on the right, Bridalveil Falls is in the shadows on the right, and the Merced River is in the foreground. In the summer, the light leaves El Capitan before Cathedral Rocks. I waited as long as possible for the light to turn warm at the end of the day, but minutes before it left El Capitan. I used a polarizing filter to reduce glare and saturate the colors. Data: Canon 5D with a 24-105mm lens set at 28mm. Aperture: f/16, Shutter: 0.6 seconds, ISO 100.
Tuesday, July 04, 2006
THE 4th of JULY 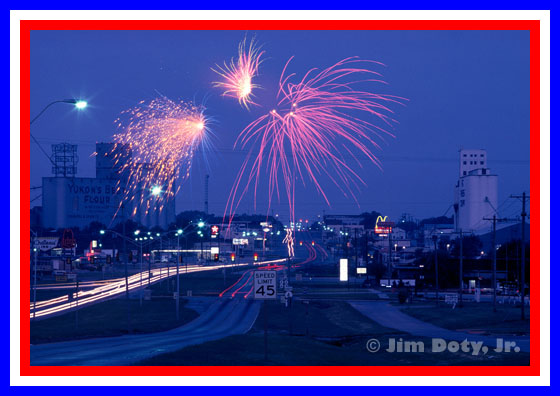
Fireworks over Yukon, Oklahoma. Photo copyright (c) Jim Doty, Jr.
"We hold these truths to be self-evident, that all men are created equal, that they are endowed by their Creator with certain unalienable Rights, that among these are Life, Liberty and the pursuit of Happiness." From the Declaration of Independence, signed July 4, 1776. Written by Thomas Jefferson (1762-1826). 3rd US President (1801-09).
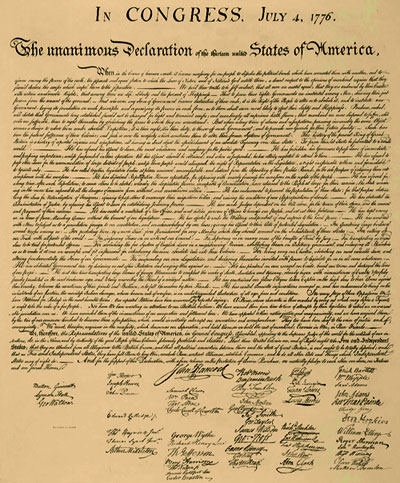
To see an engraving of the original and George Washington's personal printed copy, go here. The entire declaration follows. The Declaration of Independence of the Thirteen Colonies
In CONGRESS, July 4, 1776 The unanimous Declaration of the thirteen united States of America, When in the Course of human events, it becomes necessary for one people to dissolve the political bands which have connected them with another, and to assume among the powers of the earth, the separate and equal station to which the Laws of Nature and of Nature's God entitle them, a decent respect to the opinions of mankind requires that they should declare the causes which impel them to the separation. We hold these truths to be self-evident, that all men are created equal, that they are endowed by their Creator with certain unalienable Rights, that among these are Life, Liberty and the pursuit of Happiness. --That to secure these rights, Governments are instituted among Men, deriving their just powers from the consent of the governed, --That whenever any Form of Government becomes destructive of these ends, it is the Right of the People to alter or to abolish it, and to institute new Government, laying its foundation on such principles and organizing its powers in such form, as to them shall seem most likely to effect their Safety and Happiness. Prudence, indeed, will dictate that Governments long established should not be changed for light and transient causes; and accordingly all experience hath shewn, that mankind are more disposed to suffer, while evils are sufferable, than to right themselves by abolishing the forms to which they are accustomed. But when a long train of abuses and usurpations, pursuing invariably the same Object evinces a design to reduce them under absolute Despotism, it is their right, it is their duty, to throw off such Government, and to provide new Guards for their future security. —Such has been the patient sufferance of these Colonies; and such is now the necessity which constrains them to alter their former Systems of Government. The history of the present King of Great Britain [George III] is a history of repeated injuries and usurpations, all having in direct object the establishment of an absolute Tyranny over these States. To prove this, let Facts be submitted to a candid world. He has refused his Assent to Laws, the most wholesome and necessary for the public good. He has forbidden his Governors to pass Laws of immediate and pressing importance, unless suspended in their operation till his Assent should be obtained; and when so suspended, he has utterly neglected to attend to them. He has refused to pass other Laws for the accommodation of large districts of people, unless those people would relinquish the right of Representation in the Legislature, a right inestimable to them and formidable to tyrants only. He has called together legislative bodies at places unusual, uncomfortable, and distant from the depository of their public Records, for the sole purpose of fatiguing them into compliance with his measures. He has dissolved Representative Houses repeatedly, for opposing with manly firmness his invasions on the rights of the people. He has refused for a long time, after such dissolutions, to cause others to be elected; whereby the Legislative powers, incapable of Annihilation, have returned to the People at large for their exercise; the State remaining in the mean time exposed to all the dangers of invasion from without, and convulsions within. He has endeavoured to prevent the population of these States; for that purpose obstructing the Laws for Naturalization of Foreigners; refusing to pass others to encourage their migrations hither, and raising the conditions of new Appropriations of Lands. He has obstructed the Administration of Justice, by refusing his Assent to Laws for establishing Judiciary powers. He has made Judges dependent on his Will alone, for the tenure of their offices, and the amount and payment of their salaries. He has erected a multitude of New Offices, and sent hither swarms of Officers to harass our people, and eat out their substance. He has kept among us, in times of peace, Standing Armies without the consent of our legislatures. He has affected to render the Military independent of and superior to the Civil power. He has combined with others to subject us to a jurisdiction foreign to our constitution and unacknowledged by our laws; giving his Assent to their Acts of pretended Legislation: For Quartering large bodies of armed troops among us: For protecting them, by a mock Trial, from punishment for any Murders which they should commit on the Inhabitants of these States: For cutting off our Trade with all parts of the world: For imposing Taxes on us without our Consent: For depriving us, in many cases, of the benefits of Trial by Jury: For transporting us beyond Seas to be tried for pretended offences: For abolishing the free System of English Laws in a neighbouring Province, establishing therein an Arbitrary government, and enlarging its Boundaries so as to render it at once an example and fit instrument for introducing the same absolute rule into these Colonies: For taking away our Charters, abolishing our most valuable Laws, and altering fundamentally the Forms of our Governments: For suspending our own Legislatures, and declaring themselves invested with power to legislate for us in all cases whatsoever. He has abdicated Government here, by declaring us out of his Protection and waging War against us. He has plundered our seas, ravaged our Coasts, burnt our towns, and destroyed the lives of our people. He is at this time transporting large Armies of foreign Mercenaries to compleat the works of death, desolation and tyranny, already begun with circumstances of Cruelty and perfidy scarcely paralleled in the most barbarous ages, and totally unworthy the Head of a civilized nation. He has constrained our fellow Citizens taken Captive on the high Seas to bear Arms against their Country, to become the executioners of their friends and Brethren, or to fall themselves by their Hands. He has excited domestic insurrections amongst us, and has endeavoured to bring on the inhabitants of our frontiers, the merciless Indian Savages, whose known rule of warfare, is an undistinguished destruction of all ages, sexes and conditions. In every stage of these Oppressions We have Petitioned for Redress in the most humble terms: Our repeated Petitions have been answered only by repeated injury. A Prince whose character is thus marked by every act which may define a Tyrant, is unfit to be the ruler of a free people. Nor have We been wanting in attentions to our British brethren. We have warned them from time to time of attempts by their legislature to extend an unwarrantable jurisdiction over us. We have reminded them of the circumstances of our emigration and settlement here. We have appealed to their native justice and magnanimity, and we have conjured them by the ties of our common kindred to disavow these usurpations, which, would inevitably interrupt our connections and correspondence. They too have been deaf to the voice of justice and of consanguinity. We must, therefore, acquiesce in the necessity, which denounces our Separation, and hold them, as we hold the rest of mankind, Enemies in War, in Peace Friends. We, therefore, the Representatives of the united States of America, in General Congress, Assembled, appealing to the Supreme Judge of the world for the rectitude of our intentions, do, in the Name, and by the Authority of the good People of these Colonies, solemnly publish and declare, That these United Colonies are, and of Right ought to be Free and Independent States; that they are Absolved from all Allegiance to the British Crown, and that all political connection between them and the State of Great Britain, is and ought to be totally dissolved; and that as Free and Independent States, they have full Power to levy War, conclude Peace, contract Alliances, establish Commerce, and to do all other Acts and Things which Independent States may of right do. And for the support of this Declaration, with a firm reliance on the protection of divine Providence, we mutually pledge to each other our Lives, our Fortunes and our sacred Honor. The signers of the Declaration represented the new states as follows:
New Hampshire Josiah Bartlett, William Whipple, Matthew Thornton
Massachusetts John Hancock, Samual Adams, John Adams, Robert Treat Paine, Elbridge Gerry
Rhode Island Stephen Hopkins, William Ellery
Connecticut Roger Sherman, Samuel Huntington, William Williams, Oliver Wolcott
New York William Floyd, Philip Livingston, Francis Lewis, Lewis Morris
New Jersey Richard Stockton, John Witherspoon, Francis Hopkinson, John Hart, Abraham Clark
Pennsylvania Robert Morris, Benjamin Rush, Benjamin Franklin, John Morton, George Clymer, James Smith, George Taylor, James Wilson, George Ross
Delaware Caesar Rodney, George Read, Thomas McKean
Maryland Samuel Chase, William Paca, Thomas Stone, Charles Carroll of Carrollton
Virginia George Wythe, Richard Henry Lee, Thomas Jefferson, Benjamin Harrison, Thomas Nelson, Jr., Francis Lightfoot Lee, Carter Braxton
North Carolina William Hooper, Joseph Hewes, John Penn
South Carolina Edward Rutledge, Thomas Heyward, Jr., Thomas Lynch, Jr., Arthur Middleton
Georgia Button Gwinnett, Lyman Hall, George Walton SOURCE: Indiana University School of Law—Bloomington
Thursday, June 29, 2006
PHOTO OF THE DAY: RYAN 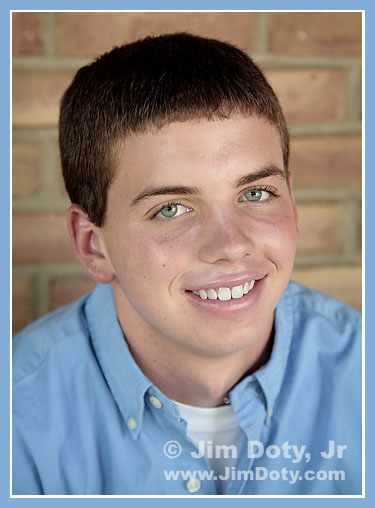
Ryan. Photo © Jim Doty, Jr.
It was bright and sunny today when I took this photo. I prefer "cloudy-bright" days with soft shadows when I do portraits, but mother nature wasn't cooperating. There is enough overhang on my front porch to provide nice, soft light for portraits and allow me room to work. I prefer to do casual portraits with the camera handheld so I can move around freely and work quickly. The reduced light level in the shade of the porch meant using an ISO of 400 for reasonable shutter speeds. The white balance was set to "cloudy". Data: Canon 5D camera. Canon EF 24-105mm f/4 IS lens at 92mm with image stabilization on. Aperture: f/4. Shutter: 1/80 second. ISO 400.
Saturday, June 03, 2006
SAVE THE INTERNET 2 An open post from Representative Zoe Lofgren who is on our side in the Net Neutrality debate in Congress. Guest post from Rep. Zoe Lofgren
May 26th, 2006 Yesterday, the House Judiciary Committee passed H.R. 5417, the “Internet Freedom and Nondiscrimination Act of 2006,” which I introduced with Committee Chairman Jim Sensenbrenner, Ranking Member John Conyers and Rep. Rick Boucher last week. This is the first bill with real protections for Net Neutrality that has passed any committee in Congress, and I am proud to be a part of it. The bill requires broadband providers to operate their networks in a non-discriminatory manner and makes sure that the phone and cable companies cannot favor or block access to the Web sites or online services that they pick instead of the consumer. It will keep the Internet an open and free marketplace of ideas and services chosen by consumers instead of big corporations. It will also guard against those who own “the pipes” gleaning profits by creating a virtual toll road. H.R. 5417 was introduced by a bipartisan coalition from the Judiciary Committee and passed out of the Committee by a vote of 20-13. Fourteen Democrats and six Republicans voted in favor of it, and 13 Republicans voted against it. One Democrat voted present. The Internet has revolutionized the way Americans communicate with one another and do business. It’s only right to keep that revolution where it belongs — in the hands of Internet users instead of the phone and cable companies. The next hurdle for Net Neutrality is whether we will have a full vote on the House floor. If you care about the freedom that Net Neutrality protects, contact your Member of Congress and ask that H.R. 5417 be scheduled to come before the full House of Representatives as either a separate bill or an amendment. Urge them to vote for Net Neutrality protection! Source: http://www.savetheinternet.com/blog/
SAVE THE INTERNET  A plan before Congress, backed by big telecom dollars, could gut the internet's first amendment: Net Neutrality. What is at risk is your right to choose the internet sites you want to go to, and even your right to receive emails from whomever you want. Do your part today to protect your internet rights and save Net Neutrality. Net Neutrality means YOU choose the sites you want to visit, and they are provided to you without outside intereference. Action could take place as early as next week in the House of Representatives to protect or take away your rights. AT&T, Verizon, Comcast, AOL-Time Warner, and other Internet Service Providers (ISPs) are spending millions of dollars lobbying Congress to gut Net Neutrality. If big telecom companies get their way, big subscribers can pay ISPs to have their web sites delivered to your computer in the "fast lane", and slow down or block other web sites from being served to your computer. You lose your power of choice. The big telecoms could block you from viewing this blog simply because I am criticizing them. Sound far fetched? It's already happening. * In 2004, North Carolina ISP Madison River blocked their DSL customers from using any rival Web-based phone service. * In 2005, Canada's telephone giant Telus blocked customers from visiting a Web site sympathetic to the Telecommunications Workers Union during a labor dispute. * In April, Time Warner's AOL blocked all emails that mentioned www.dearaol.com — an advocacy campaign opposing the company's pay-to-send e-mail scheme. NPR and PBS have reported on these and other similar abuses. FCC Commissioner Michael Copps has called for stronger Net Neutrality protections. Existing laws provide insufficient protection against these abuses. The FCC acts on the rules but congress makes them. If legislation before congress passes, we will have little or no protection from having our ISPs (internet service providers) decide what sites they will allow us to access, and how fast. If big telecom companies get their way, the internet as we now know it will go away. Imagine you want to buy an item on the internet. Company A is selling it for $100 and Company B is selling it for $60. You go to Company B's web site but it loads very slowly or not at all. Why? Because Company A paid the telecom company to give them priority so your access to Company B is either dramatically slowed down or blocked completely. Big dollars, not your choices, will control the internet. Who is on our side? Supporters of Net Neutrality include Amazon.com, Earthlink, EBay, Google, Intel, Microsoft, Skype, Vonage and Yahoo, the American Library Association, churches and hundreds of other non-profit organizations, political groups, bloggers, small businesses, thousands of small web site owners, and thousands of others who are opposed to the telecom backed plan now before congress. Also on our side are some of the computer scientists that developed the internet in the first place. NPR and PBS have reported that several telecom executives have already announced their plans to decide which web sites get served to you in the fast lane (based on big buck payments to the telecoms), which web sites are served in the slow lane, and which ones won't be delivered at all. Big telecoms and other ISPs want this huge source of potential new income. For big telecoms, the internet isn't a highway system where you choose to go in whatever vehicle you have Idial up, cable, DSL etc). Telecom execs refer to the internet as "big pipes" and they want to control what flows down the pipelines to your computer. And they will choose based on who pays them the biggest bucks to send their content to your computer. A multi-million dollar ad campaign ("Hands Off the Internet") has been launched by the big telecoms to downplay the Net Neutrality cause. Do you trust the big telecoms to have your best interests at heart, or all the online companies, big and small, that want you to have equal access to the sites you want to visit on the internet? The glory of the internet is neutrality. Any ordinary Joe or Jane can put up a website and anyone else can go to it. The pages on my web sites receive between 1,500 and 2,000 visits per day, and anyone can find me on Google or most any other search engine. If big telecom gets their way, I would have to pay them or they won't feed my site down "their big pipes" to your computer. I will be shunted off to one of "their little pipes" at really slow speeds or not at all. For more information, go to SaveTheInternet.com. Be sure and read the FAQ, then write, call, and email your representatives in congress. 
Sunday, May 28, 2006
REUTERS: CANON CONSIDERS HALT TO FILM CAMERA DEVELOPMENT 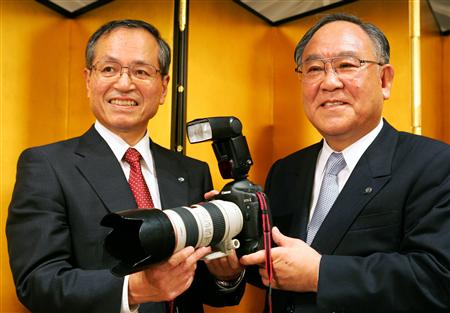
Canon Chairman and CEO Fujio Mitarai (right) and President and COO Tsuneji Uchida during a news conference in Tokyo, May 11, 2006. REUTERS/Issei Kato
This could be the beginning of the end of an era. "TOKYO (Reuters) - Japan's Canon Inc. said on Thursday that it would consider halting development of new film cameras as it focuses resources on digital models, the latest sign of the rapidly fading role of film in photography. to continue, use the page links to the right
"A spokesman at Canon, the world's largest digital camera maker, said it would consider whether it needs to continue developing both compact and single lens reflex (SLR) film models because the markets for both are shrinking. "Canon said it would continue to produce and sell existing models and make a final judgment on the business in the future while monitoring market demand." The full Reuters story is here.
Wednesday, May 24, 2006
OPTIMIZING DIGITAL CAMERA FILES 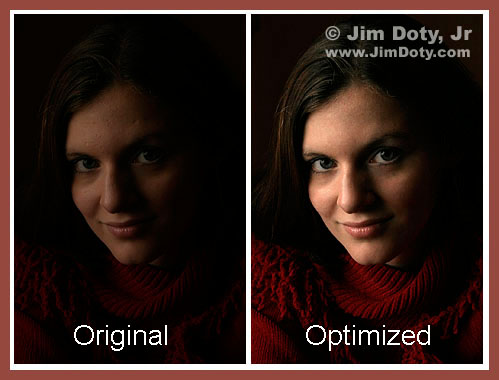
Rachel. The original file straight out of the camera is on the left, and the digitally optimized image is on the right. Photos © Jim Doty, Jr.
This is an excerpt from a longer article: "Point and shoot digital cameras are designed to produce punchy (colorful, high contrast) photos right out of the camera. This saves the average person from doing a lot of digital work on their computer. There is a cost: images that lose valuable photo information that shows up in lost highlight and shadow detail. Pixelation, banding, and other problems can show up in large prints. Fortunately, many of the better point and shoot cameras will allow you to tone down the in-camera image processing if you want to work with the digital files yourself and maximum quality is important. "Professional digital cameras are designed to capture maximum data with minimal in-camera processing. The images may look flat coming out of the camera, but more data has been saved so the skilled digital darkroom artist has the maximum potential for beautiful enlargements. Levels, Curves, Hue-Saturation, Shadow-Highlight, Channel Mixer, Adjustment Layers, Gaussian Blur, Unsharp Mask, Layer Masks, Clone Stamp, and Healing Brush are just a few of the tools and options available to make the most of an image. Just as in the old black and white darkroom, skill and experience are still important." You can read the full article at my photo web site.
Wednesday, April 19, 2006
RATED: ONLINE PHOTO LABSYou've been thinking about trying an online photo lab. It sounds simple, send your files over the internet and the photos arrive in the mail a few days later. But how good is the quality? What about cost? How long does it take? How good are the poster prints? Pop Photo to the rescue with another of their fine comparison articles, "Click to Print", in the May 2006 issue (pp. 75-79). They sent photo files to 10 online labs and rated them in six categories: Print Quality, Price, Ease of Use, Turnaround Time, Storage Policy, and Poster Prints (quality). Each lab was given from 1 to 6 stars (6 being best) in each category. I've summarized the results in the following graphic. 
There are additional comments in the article about each lab. Do you want to create a photobook, make U.S. postage stamps with your own photos on them, or put your photos on specialty items? How easy or difficult are the sites to navigate? Does a site excel in some unique way? The article will tell all this and more. If you want to try an online photo lab, this article article is well worth reading.
Tuesday, April 18, 2006
USING GRADUATED NEUTRAL DENSITY FILTERS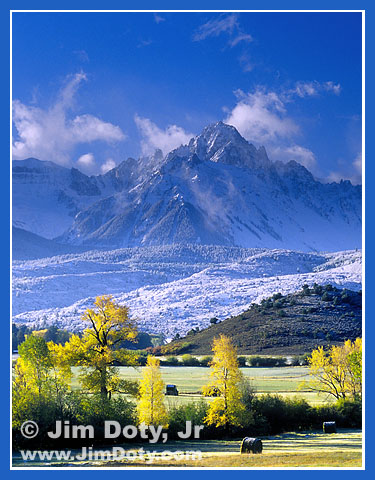
Mt. Sneffels, San Juan Mountains, Colorado. Photo © Jim Doty, Jr.
A common problem for nature photographers is the contrast range between bright skys and a darker foreground, or a bright scene and a much darker reflection of that scene in a lake or pond. Expose for the bright part of the scene and the dark part disappears. Expose for the dark part of the scene and the bright part is washed out. For years, the secret weapon for such situations has been the graduated neutral density filter (also called a graduated gray filter or split neutral density filter). A "grad" filter is half clear and half neutral density (one or two stops darker than the clear section) with a gradation zone in the middle. Grad filters are usually square and can be rotated and moved up and down in a filter holder that mounts on the front of your lens. The darker part of the filter is put over the bright part of the scene with the clear part of the filter over the dark part of the scene. With the light part of the scene toned down by one, two, or three stops (the most common strengths), the contrast has been tamed for a more pleasing picture. When I use a grad filter, I meter first and align later. I set my camera in manual mode and choose the aperture I want. With the grad filter in place, I meter the light part of the scene through the dark part of the filter and note the shutter speed. Then I meter the dark part of the scene through the clear part of the filter and note the shutter speed. If the shutter speeds are the same, all is golden. If they aren't, I shoot at both shutter speeds plus everything in between in half or third stop increments. If the two meter readings are really far apart, I switch to a stonger grad (time permitting). I move the filter up or down for the meter readings so the meter isn't confused by the gradation zone in the middle of the filter. I slide the filter down so the lens/meter sees through only the darker part of the filter when metering the brighter part of the scene. Then I slide the filter up so the lens/meter sees only through the clear part of the filter when metering the darker foreground. Once the shutter speed (or speeds) have been determined, I stop the lens down to its taking aperture and position the filter before taking the photos. The location of the gradation zone will shift as apertures are changed so its important to stop down to the taking aperture when positioning the filter. This all goes much faster than it sounds. (1) Slide filter down, aim at the sky and meter. (2) Slide filter up, aim at the foreground and meter. (3) Recompose, position gradation line and shoot. If I don't have time to meter both areas, I only meter the light part of scene through the dark part of the filter, recompose, shoot and bracket. I think the greater photographic "sin" is a washed out sky than an underexposed foreground. You can get filters with a soft or hard gradation (the soft gradation is more gradual) and the neutral density part of the filter can range from one stop to 5 stops. My most used grad is a two f-stop filter with a soft gradation zone. My second choice is a 3 f-stop grad with a hard gradation zone. A two stop soft grad was used on the photo at the top. The dark part of the filter was over the peak and sky and the clear part of the filter was over the foregorund and snow covered hills. In the digital era, a lot of photographers take several exposures based on the light and dark poart of the scenes and composite them together in the computer. This works but it is a lot of work. It is still better, if at all possible, to get it right in the camera with a grad filter. Singh-Ray makes my favorite brand of grad filters and they have several examples of their use. 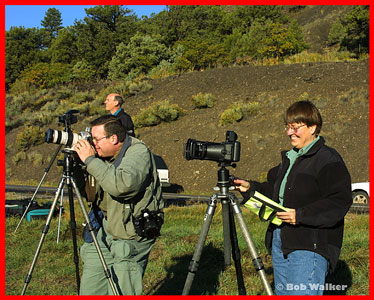
Bob Walker took this photo of me (left) and Kathleen Norris Cook (right) as we photographed Mt. Sneffels. It is hard to see in this photo, but we are both using graduated neutral density filters. She does some stunning photography.
Wednesday, April 12, 2006
PHOTO OF THE DAY - KATI
Kati. Photo © Jim Doty, Jr.
This photo was taken as part of the shoot for Kati's senior pictures. We are both flat on the floor. We did a similar shot without the hair falling across her face, but we both like this one.The camera was hand held in natural light with no flash so the ISO was set to 800. Even at that, the shutter speed was 1/8 second - awfully slow for hand held work. The image stabilization (IS) built into the lens made the shot possible. Data: Canon EF 24-105mm f/4L IS lens set at 90mm. Aperture: f/5. Shutter: 1/8 second.
Friday, March 31, 2006
FREE MICROSOFT GOODIES FOR PHOTOGRAPHERSMicrosoft has free goodies for photographers. Book mark www.microsoft.com/prophoto/ and check it out on a periodic basis. A variety of helpful articles are posted on a regular basis. Under DOWNLOADS you will find Microsoft's Raw Image Viewer which has been updated to include the Canon 5D and the Nikon D200.
Thursday, March 23, 2006
Q&A: FIRST BEACH SESSION 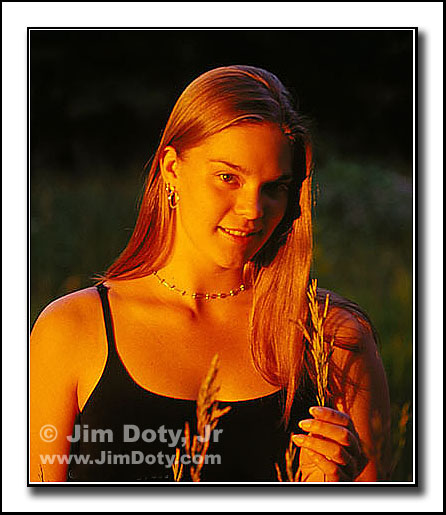
Angela in Tall Grass at Sunset. Photo © Jim Doty, Jr.
I checked my email inbox and read "I will do my first beach session today and I am panicking...any advice?" Here's the email. . . --- --- Jim, In order to calm down I came online and searched about the Canon 20D and white sand. I was led straight to you. I have a light meter if you think it will help. Jim what exact settings would you use in this event? I will shoot one hour before sundown, and the sand is pure white as snow. My subjects are 3 small children hopefully dressed in white and khaki. I pray that you will email me before I leave at noon with some comforting advice. Oh I use a 580 speedlite as well that will be bracketed on my camera. My problem is I want to compose the shot and lose sight of all those settings of aperture, shutter speed ISO, metering, white balance etc… If I could just be prepared when I get there that will be 80 percent of the battle. Your web-site has been a blessing, you speak a language I actually understand.
Debbie --- --- I checked my watch and had about 10 minutes to send a response and meet her noon deadline. With a little more lead time, I would have provided more detailed answers and suggested she pick up a light amber gel for her flash to match the color temperature at sunset. Given ten minutes, this is what I came up with: --- --- Debbie: Print this and take it with you! Put the camera on manual mode. If the children have light caucasian skin, get in close and meter the sunlit side of the face of one of the children and add about one stop of light. If the camera meter says 1/125 at f11, set the camera for 1/125 at f/8. If that makes their skin too light, add 2/3 of a stop over the meter reading. If you do this right, their skin will look normal and the beach will look white. Don't let the white sand fool the meter. That's why you get close and meter a face. With children I would want a shutter speed of at least 1/60 second and 1/125 would be better. I would also want an aperture of f/5.6 or better yet f/8 for enough depth of field. You may need to increase the ISO from 100 to ISO 400 or ISO 800 to get a fast enough shutter and enough depth of field. Use the flash to fill in shadows, not as the main light source or you will lose the wonderful warmth of the sunset light. Push the flash compensation button on the camera (top deck right) and spin the thumb wheel (camera back) to set the flash for minus 2/3 to minus 1 stop of light. Take a couple of test shots to see how things look. Take lots of pictures and bracket around your primary exposure if need be. Above all else - HAVE FUN! If you have fun, everyone else will be more at ease. Let me know how things work out. Good Luck! Jim --- --- I sent the email at 11:52 AM. I hope she got it in time. The photo at the top of this post was taken in a grassy meadow with dark, shaded trees in the background. The exposure challenge is the same as a subject with a white background: Don't allow the background to influence the camera meter. The solution in both cases is the same, set the camera meter in manual mode and move in close enough to meter just the face. For light skin, add a stop of light to what the camera meter tells you. For medium-toned skin, shoot at the meter setting. For dark skin, subtract one half stop from what the camera meter tells you. You can learn more in my exposure article. UPDATE: March 25, 2006 I received the following email from Debbie. --- --- Jim, Thanks a million! I took the note with me and tried what you said and got some beautiful shots! I will send you some when I get the time, its real busy for me right now. Mostly thanks for reminding me to have fun! I did that too and so did the clients. Your email was very encouraging and I was amazed you caught me before I left. I thank God for you and have told all my close peeps about my special email experience. Once again thanks a million! Debbie
|